Getting Started with Clawdbot
Deploy your personal AI assistant across WhatsApp, Telegram, Discord, and 10+ messaging platforms

Clawdbot is an open-source, self-hosted personal AI assistant that connects to your favorite messaging platforms. Unlike cloud-based AI assistants, Clawdbot runs entirely on your infrastructure, giving you complete control over your data while providing seamless AI interactions across WhatsApp, Telegram, Discord, Slack, Signal, iMessage, and more.
This guide will take you from zero to a fully working Clawdbot instance in under 30 minutes.
Table of Contents
- Prerequisites
- Install the CLI
- Run the Onboarding Wizard
- Start the Gateway
- Verify Installation
- Connect Your First Channel
- Understanding DM Safety & Pairing
- Send Your First Message
- Essential Commands Reference
- Next Steps
Step 0: Prerequisites
Before installing Clawdbot, ensure your system meets these requirements:
System Requirements
| Requirement | Details |
|---|---|
| Node.js | Version 22 or higher (required) |
| Operating System | macOS, Linux, or Windows (via WSL2) |
| Memory | Minimum 2GB RAM recommended |
| Storage | ~500MB for installation |
Check Node.js Version
node --version
# Should output: v22.x.x or higher
If you need to install or upgrade Node.js:
# Using nvm (recommended)
curl -o- https://raw.githubusercontent.com/nvm-sh/nvm/v0.39.0/install.sh | bash
source ~/.bashrc  # or ~/.zshrc
nvm install 22
nvm use 22

# Or using Homebrew (macOS)
brew install node@22
Windows Users: Install WSL2 First
Windows users must use WSL2 (Windows Subsystem for Linux). Native Windows is not supported.
# In PowerShell (Admin)
wsl --install -d Ubuntu

# After restart, open Ubuntu and continue with Linux instructions
Optional but Recommended
- Brave Search API Key: For web search capabilities
- Get your key at https://brave.com/search/api/
- Configure later with:
clawdbot configure --section web
- pnpm: If building from source
npm install -g pnpm
Step 1: Install the Clawdbot CLI
Choose your preferred installation method:
Method A: Quick Install Script (Recommended)
macOS / Linux:
curl -fsSL https://clawd.bot/install.sh | bash
Windows (PowerShell in WSL2):
# Inside WSL2 Ubuntu terminal
curl -fsSL https://clawd.bot/install.sh | bash
Method B: Global npm Install
npm install -g clawdbot@latest
Or with pnpm:
pnpm add -g clawdbot@latest
Verify Installation
clawdbot --version
# Should output the current version number
Installing ClawdBot using Docker
# Clone the repo
git clone https://github.com/clawdbot/clawdbot.git
cd clawdbot

# Run the setup script — handles everything
./docker-setup.sh
This builds the image, runs onboarding, and starts the gateway. Open http://127.0.0.1:18789/ and paste the token it generates.
Step 2: Run the Onboarding Wizard
The onboarding wizard is the easiest way to configure Clawdbot. It handles:
- Model and authentication setup
- Gateway configuration
- Channel connections (WhatsApp, Telegram, Discord, etc.)
- Security settings (DM pairing)
- Background service installation
Launch the Wizard
clawdbot onboard --install-daemon
What the Wizard Will Ask
1. Gateway Mode
? Gateway mode:
  ❯ Local (run on this machine)
    Remote (connect to existing gateway)
Choose Local for your first installation.
2. Authentication Method
? Authentication method:
  ❯ Anthropic API Key (recommended)
    OpenAI API Key
    OAuth (Claude Pro/Max subscription)
    OpenAI Code (Codex subscription)
Recommended: Use an Anthropic API Key for the best experience with Claude models.
- Get your API key at: https://console.anthropic.com/
- The wizard will securely store it in
~/.clawdbot/
3. Model Selection
? Default model:
  ❯ anthropic/claude-opus-4-5 (best quality)
    anthropic/claude-sonnet-4-5 (balanced)
    openai/gpt-4-turbo
    openai/gpt-4o
4. Channel Configuration
? Which channels do you want to enable?
  ◉ WhatsApp
  ◯ Telegram
  ◯ Discord
  ◯ Slack
  ◯ Signal
Select the channels you want to use. You can add more later.
5. Personal Phone Number (for WhatsApp)
? Your WhatsApp phone number (for allowlist):
  +1234567890
Enter your phone number in E.164 format (with country code). This adds you to the allowlist so you can message your bot.
6. Install Background Service
? Install as background service?
  ❯ Yes (recommended - auto-starts on boot)
    No (manual start only)
Choose Yes to have Clawdbot run automatically.
Configuring Discord for Clawdbot
For Discord, you might need to configure bot token first:
For the first time, I faced the following issue - Error 4014 means your Discord bot is trying to use privileged intents that haven't been enabled in the Discord Developer Portal.
I followd the steps to fix Discord Intents:
- Open Discord Developer Portal
- Select your bot application
- Navigate to Bot → Privileged Gateway Intents
- Enable these intents:
✅ MESSAGE CONTENT INTENT (required for reading messages)
✅ SERVER MEMBERS INTENT (optional, for member info)
✅ PRESENCE INTENT (optional)
- Click Save Changes
By now, your Gateway should run successfully!
✅ Gateway listening on ws://127.0.0.1:18789
✅ Browser control on http://127.0.0.1:18791
✅ Model: anthropic/claude-opus-4-5
✅ Canvas mounted
✅ Heartbeat started
Configuration Files Created
After the wizard completes, these files are created:
~/.clawdbot/
├── clawdbot.json          # Main configuration
├── credentials/
│   ├── oauth.json         # OAuth tokens (if using)
│   └── whatsapp/
│       └── default/
│           └── creds.json # WhatsApp session
└── agents/
    └── main/
        └── agent/
            └── auth-profiles.json  # API keys
Step 3: Start the Gateway
If you installed the background service, the gateway should already be running. Check its status:
clawdbot gateway status
Manual Start (if needed)
For foreground operation with verbose logging:
clawdbot gateway --port 18789 --verbose
You should see output like:
[Gateway] Starting on ws://127.0.0.1:18789
[Gateway] Control UI available at http://127.0.0.1:18789/
[Gateway] WhatsApp channel initializing...
[Gateway] Ready
Access the Dashboard
Open your browser and navigate to:
http://127.0.0.1:18789/
This opens the Control UI where you can:
- Monitor gateway health
- View active sessions
- Check channel status
- Send test messages
Note: If you configured a gateway token, you'll need to enter it in the Control UI settings.
Step 4: Verify the Installation
Run these commands to ensure everything is working:
Check Overall Status
clawdbot status
Expected output:
Gateway: running (ws://127.0.0.1:18789)
Auth: configured (anthropic)
Channels:
  - whatsapp: ready (linked)
  - telegram: not configured
  - discord: not configured
Sessions: 0 active
Health Check
clawdbot health
Expected output:
Gateway Health: OK
  Uptime: 5m 23s
  Memory: 124MB
  Auth: valid
  Channels: 1/1 healthy
Run Doctor (Comprehensive Check)
clawdbot doctor
This performs a comprehensive system check and reports any issues.
Step 5: Connect Your First Channel
Option A: WhatsApp (Most Popular)
WhatsApp uses QR-based device linking via WhatsApp Web protocol.
Step 5.1: Get a Phone Number
Recommended: Use a dedicated phone number for your Clawdbot:
- Old spare phone with an eSIM
- Prepaid SIM card
- WhatsApp Business on a separate number
Alternative: Use your personal number (requires selfChatMode)
Step 5.2: Link WhatsApp
clawdbot channels login
This displays a QR code in your terminal:
█▀▀▀▀▀█ ▄▄▄▄▄ █▀▀▀▀▀█
█ ███ █ █▄▄▄█ █ ███ █
█ ▀▀▀ █ ▀▄▄▄▀ █ ▀▀▀ █
▀▀▀▀▀▀▀ █ █ █ ▀▀▀▀▀▀▀
[Scan this QR code with WhatsApp]
Step 5.3: Scan the QR Code
- Open WhatsApp on your phone
- Go to Settings → Linked Devices
- Tap Link a Device
- Scan the QR code displayed in your terminal
Step 5.4: Verify Connection
clawdbot channels status
Expected output:
WhatsApp:
  Status: connected
  Account: +1234567890
  Linked: true
  Last activity: just now
WhatsApp Configuration
Your ~/.clawdbot/clawdbot.json should include:
{
  "channels": {
    "whatsapp": {
      "dmPolicy": "allowlist",
      "allowFrom": ["+1234567890"]
    }
  }
}
Configuration Options:
| Option | Description | Default |
|---|---|---|
dmPolicy | allowlist, pairing, open, disabled | pairing |
allowFrom | Array of allowed phone numbers (E.164) | [] |
selfChatMode | Enable if using personal number | false |
groupPolicy | allowlist, open, disabled | allowlist |
Option B: Telegram
Step 5.1: Create a Bot
- Open Telegram and message @BotFather
- Send
/newbot - Follow the prompts to name your bot
- Copy the bot token provided
Step 5.2: Configure Telegram
clawdbot configure --section telegram
Or manually edit ~/.clawdbot/clawdbot.json:
{
  "channels": {
    "telegram": {
      "botToken": "123456789:ABCdefGHIjklMNOpqrsTUVwxyz"
    }
  }
}
Step 5.3: Restart Gateway
clawdbot gateway restart
Option C: Discord
Step 5.1: Create a Discord Application
- Go to Discord Developer Portal
- Click New Application
- Go to Bot → Add Bot
- Copy the bot token
- Enable required intents:
- Message Content Intent
- Server Members Intent (optional)
Step 5.2: Configure Discord
{
  "channels": {
    "discord": {
      "token": "your-discord-bot-token"
    }
  }
}
Step 5.3: Invite Bot to Server
Create an invite URL with required permissions:
https://discord.com/api/oauth2/authorize?client_id=YOUR_APP_ID&permissions=274877908992&scope=bot
Step 6: DM Safety and Pairing
Clawdbot implements a pairing system to prevent unwanted message processing. This is crucial for security.
How Pairing Works
Unknown Sender → Sends DM → Clawdbot
                              │
                              ▼
                    ┌─────────────────┐
                    │ Generate 6-digit│
                    │  pairing code   │
                    └────────┬────────┘
                              │
                              ▼
              Sender receives: "Pair with code: 123456"
              (Message is NOT processed)
                              │
                              ▼
            Admin approves: clawdbot pairing approve whatsapp 123456
                              │
                              ▼
                   Sender added to allowlist
                   Future messages processed
Managing Pairing Requests
List pending requests:
clawdbot pairing list whatsapp
Output:
Pending pairing requests for whatsapp:
  Code: 123456  Phone: +1987654321  Expires: 59m
  Code: 789012  Phone: +1555123456  Expires: 45m
Approve a request:
clawdbot pairing approve whatsapp 123456
Reject a request:
clawdbot pairing reject whatsapp 123456
DM Policies Explained
| Policy | Behavior |
|---|---|
pairing | Unknown senders get pairing code (default, most secure) |
allowlist | Only explicitly allowed numbers can message |
open | Anyone can message (requires allowFrom: ["*"]) |
disabled | DMs completely disabled |
Recommended: Start with pairing and approve trusted contacts.
Step 7: Send Your First Message
Method A: Via WhatsApp/Telegram
Simply send a message to your Clawdbot from an approved number:
You: Hello Clawdbot!
Clawdbot: Hello! I'm Clawd, your personal AI assistant. How can I help you today? 🦞
Method B: Via CLI
clawdbot message send --target +1234567890 --message "Hello from CLI!"
Method C: Via Agent CLI
For interactive conversations:
clawdbot agent --message "What's the weather like today?"
With thinking mode enabled:
clawdbot agent --message "Solve this logic puzzle..." --thinking high
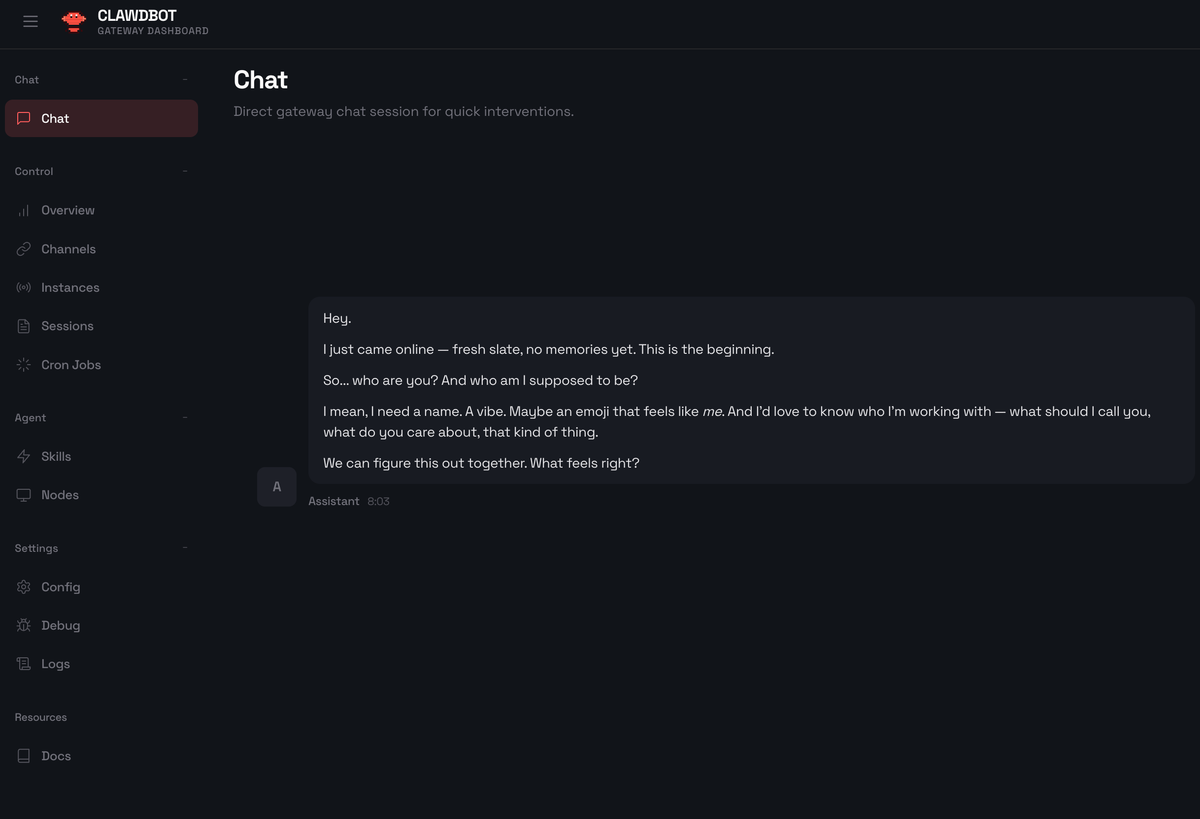
Method D: Via WebChat
Open the Control UI dashboard and use the WebChat interface:
http://127.0.0.1:18789/
Step 8: Essential Commands Reference
Gateway Management
# Check gateway status
clawdbot gateway status

# Start gateway (foreground)
clawdbot gateway --port 18789 --verbose

# Restart gateway
clawdbot gateway restart

# Stop gateway
clawdbot gateway stop

# View logs
clawdbot logs --follow
Channel Management
# List all channels
clawdbot channels status

# Login to WhatsApp
clawdbot channels login

# Logout from WhatsApp
clawdbot channels logout

# Login to specific account (multi-account)
clawdbot channels login --account work
Session Management
# List active sessions
clawdbot sessions list

# View session history
clawdbot sessions history <session-id>

# Reset a session
clawdbot sessions reset <session-id>
Pairing Management
# List pending pairing requests
clawdbot pairing list whatsapp

# Approve pairing
clawdbot pairing approve whatsapp <code>

# Reject pairing
clawdbot pairing reject whatsapp <code>
Configuration
# Open configuration wizard
clawdbot configure

# Configure specific section
clawdbot configure --section web
clawdbot configure --section telegram

# Run doctor (diagnostic)
clawdbot doctor

# View full status
clawdbot status --all
Chat Commands (In-Chat)
Send these commands directly in WhatsApp/Telegram:
| Command | Description |
|---|---|
/status | Show session status (model, tokens, cost) |
/new or /reset | Reset the conversation |
/compact | Compress conversation context |
/think <level> | Set thinking level (off/minimal/low/medium/high/xhigh) |
| `/verbose on\ | off` |
| `/usage off\ | tokens\ |
| {% raw %}`/activation mention\ | always` |
Step 9: Next Steps
Congratulations! You have a working Clawdbot installation. Here's what to explore next:
Add More Channels
- Telegram: docs.clawd.bot/channels/telegram
- Discord: docs.clawd.bot/channels/discord
- Slack: docs.clawd.bot/channels/slack
- Signal: docs.clawd.bot/channels/signal
- Microsoft Teams: docs.clawd.bot/channels/msteams
Install Companion Apps
- macOS Menu Bar App: docs.clawd.bot/platforms/macos
- iOS Node: docs.clawd.bot/platforms/ios
- Android Node: docs.clawd.bot/platforms/android
Enable Voice Features
- Voice Wake: docs.clawd.bot/nodes/voicewake
- Talk Mode: docs.clawd.bot/nodes/talk
Configure Remote Access
- Tailscale Integration: docs.clawd.bot/gateway/tailscale
- SSH Tunnels: docs.clawd.bot/gateway/remote
Explore Skills & Tools
- Browser Control: docs.clawd.bot/tools/browser
- Skills System: docs.clawd.bot/tools/skills
- Automation (Cron): docs.clawd.bot/automation/cron-jobs
Customize Your Agent
Create a workspace at ~/clawd/ with custom prompts:
mkdir -p ~/clawd
Add these files:
AGENTS.md- Agent instructionsSOUL.md- Personality definitionTOOLS.md- Custom tool instructions


