Getting Started with NVIDIA NeMoClaw on Jetson AGX Thor
NVIDIA just dropped NeMoClaw at GTC 2026 and the actual sandbox code is already live on GitHub. I dug into the source: binary-scoped network enforcement, a live policy proxy that lets you change security rules without rebuilding the image. Here's how to run it on Jetson AGX Thor. 🦞

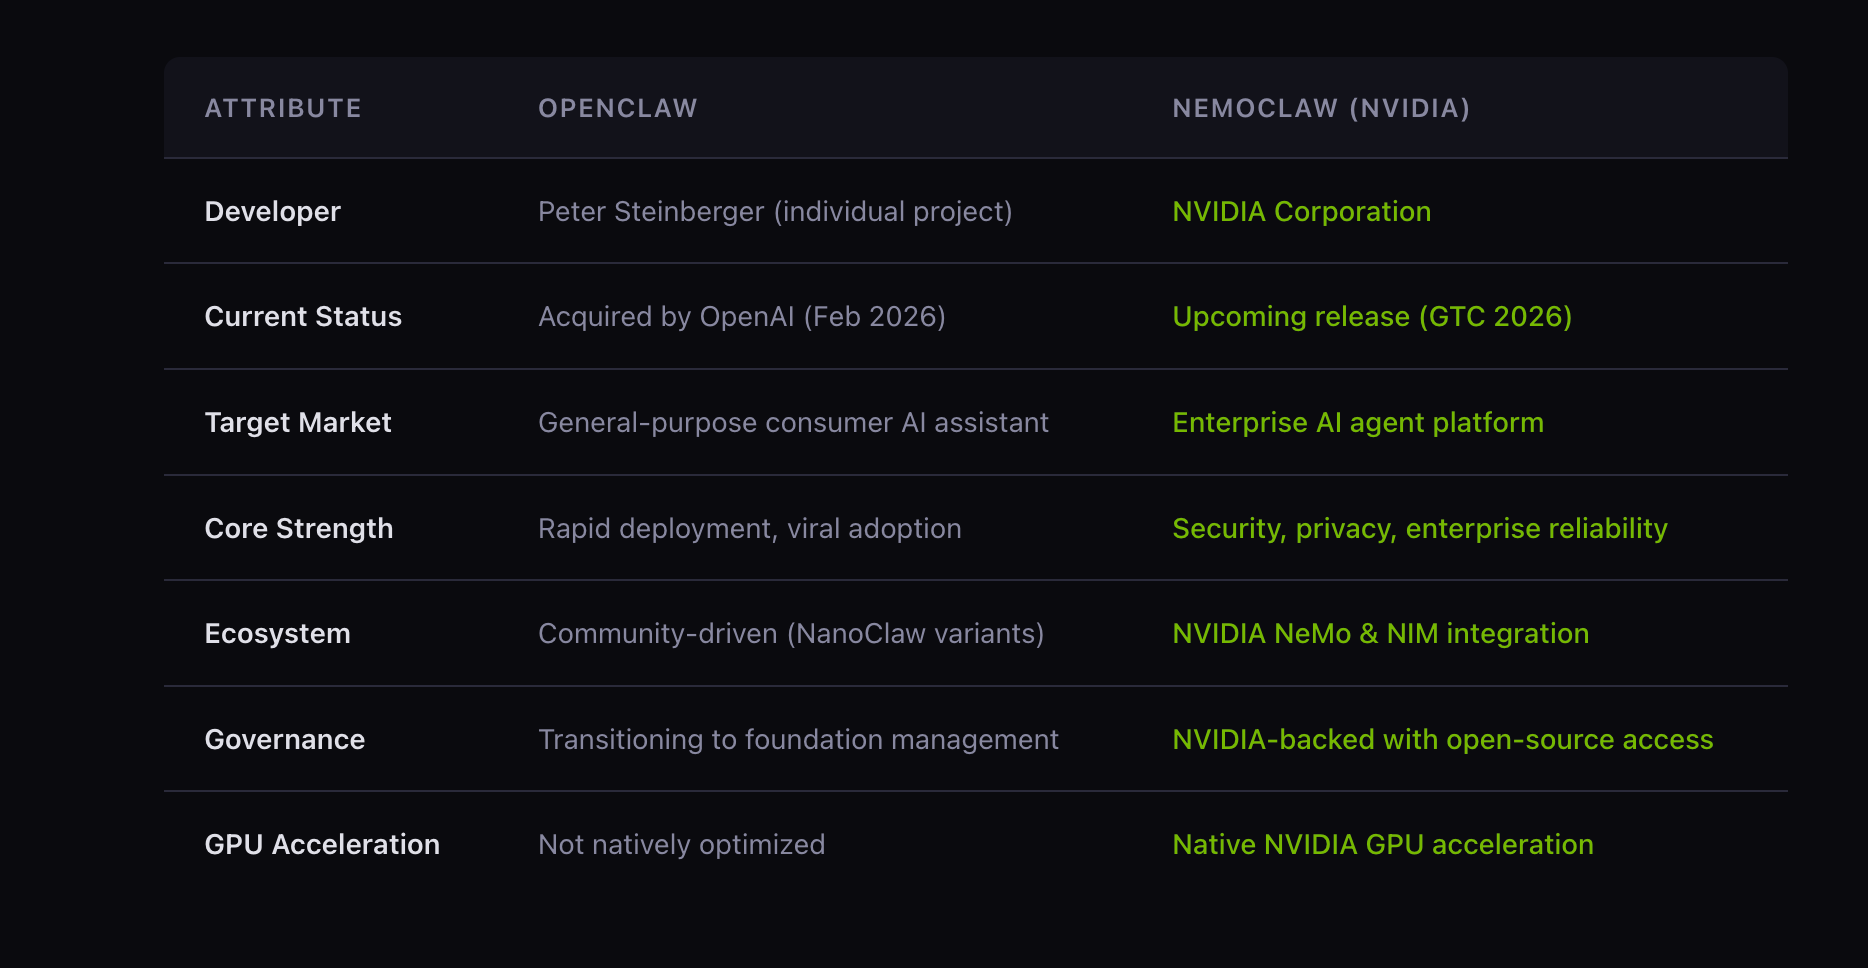
Fresh off the GTC 2026 stage, NVIDIA has officially unveiled NeMoClaw ~ its open-source enterprise AI agent platform. If you've been tracking the agentic AI wave — OpenClaw, NanoClaw, and the broader Claw ecosystem — NeMoClaw is NVIDIA's enterprise answer: secure, privacy-first, multi-agent capable, and fully open source under Apache 2.0.
In this tutorial, I'll walk you through the actual NeMoClaw sandbox that NVIDIA has published in the OpenShell-Community repository, deploy it on Jetson AGX Thor, and break down exactly how the architecture works — from the Docker build, to the policy proxy, to the NeMoClaw DevX UI extension.
What Is the NeMoClaw Sandbox?
The openclaw-nvidia sandbox is a Docker image that layers the NeMoClaw DevX UI extension on top of the OpenClaw base sandbox. Think of OpenClaw as the engine and NemoClaw as the full enterprise vehicle on top.
What you get out of the box:
| Component | What It Does |
|---|---|
| NVIDIA Model Selector | Switch between NVIDIA-hosted models (Kimi K2.5, Nemotron 3 Super, DeepSeek V3.2) directly from the UI |
| Deploy Modal | One-click deploy to DGX Spark / DGX Station from any conversation |
| API Keys Page | Settings page to enter/manage NVIDIA API keys, persisted in localStorage |
| NeMoClaw Nav Group | Sidebar navigation with real-time status indicators |
| Contextual Nudges | Inline error-state links guiding users to configure missing keys |
| Policy Proxy | Reverse proxy that intercepts /api/policy for runtime policy reads/writes |
| Startup Script | openclaw-nvidia-start — injects API keys, onboards, starts the gateway |
Architecture Overview
Here's how the pieces fit together at runtime:
Browser (port 18789)
       │
       ▼
policy-proxy.js  ← intercepts /api/policy (read/write policy.yaml)
       │
       ▼
OpenClaw Gateway (port 18788)
       │
       ▼
NVIDIA Inference Endpoints
  integrate.api.nvidia.com
    ├── Kimi K2.5
    ├── Nemotron 3 Super
    └── DeepSeek V3.2
The policy proxy runs on the public port (18789) and forwards everything to the OpenClaw gateway on the internal port (18788). It also intercepts /api/policy to let the UI read and write policy.yaml at runtime — without restarting the container.
Prerequisites
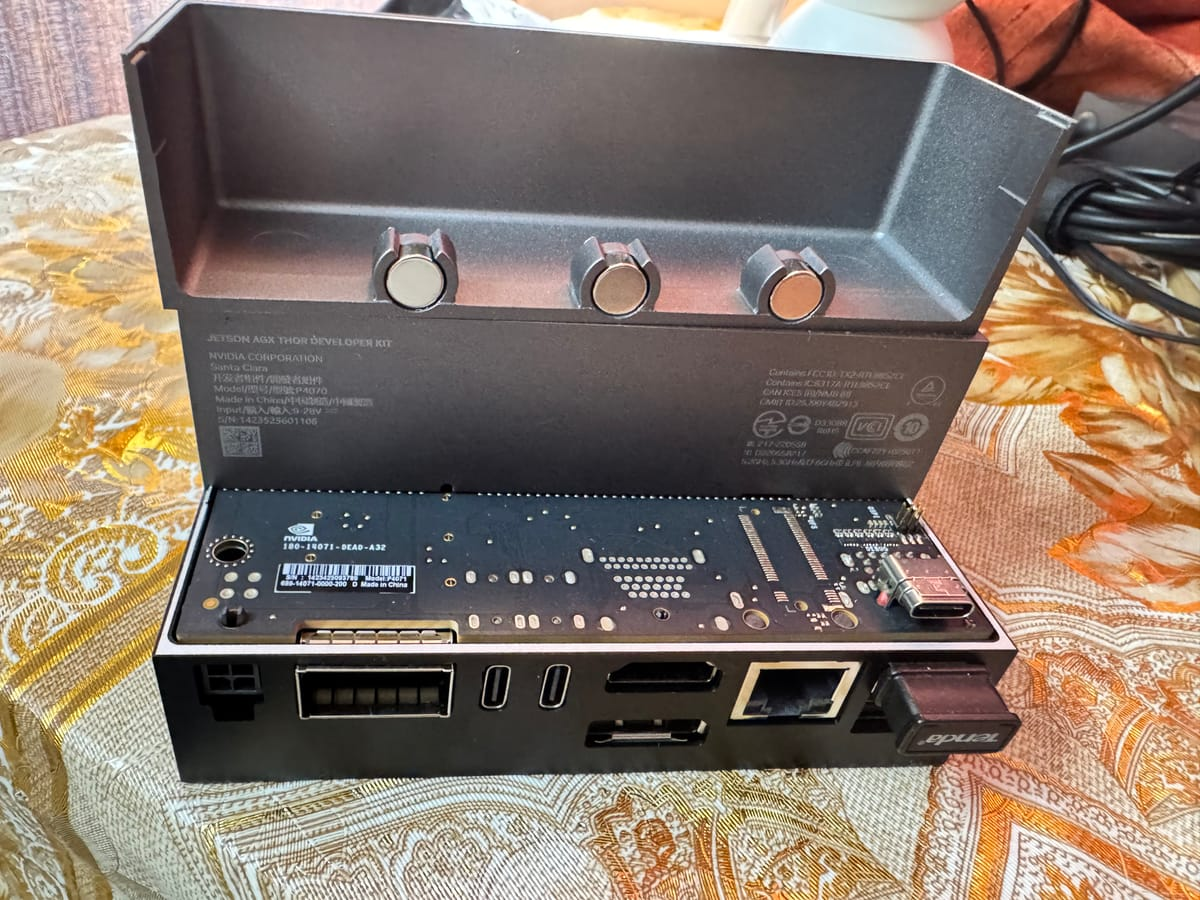
- NVIDIA Jetson AGX Thor Developer Kit (JetPack 6.x or later)
- Docker + NVIDIA Container Toolkit
openshellCLI installed- NVIDIA
integrate.api.nvidia.comAPI key
# Verify your setup
docker --version
nvidia-smi
openshell version
Step 1: Clone the Repository
git clone https://github.com/NVIDIA/OpenShell-Community.git
cd OpenShell-Community
git checkout feat/brev-nemoclaw-plugin
Navigate to the sandbox:
cd sandboxes/openclaw-nvidia
ls -la
# .gitignore
# Dockerfile
# README.md
# build.sh
# nemoclaw-ui-extension/
# openclaw-nvidia-start.sh
# policy-proxy.js
# policy.yaml
# proto/
Step 2: Build the Docker Image
Here's exactly what the Dockerfile does at build time:
- Starts from the OpenClaw base image —
ghcr.io/nvidia/openshell-community/sandboxes/openclaw:latest - Installs runtime deps —
jq, gRPC Node packages (@grpc/grpc-js,@grpc/proto-loader,js-yaml) - Bakes in
policy.yamlto/etc/navigator/as the default policy - Copies
openclaw-nvidia-start.shto/usr/local/bin/openclaw-nvidia-start - Installs the policy proxy (
policy-proxy.js) and gRPC proto definitions - Patches security vulnerabilities — fixes
@hono/node-serverauth bypass (GHSA-wc8c-qw6v-h7f6) and upgradestarto 7.5.11 (six CVEs addressed) - Bundles the NeMoClaw DevX TypeScript extension with
esbuildand injects it into the OpenClaw SPA via<script>and<link>tags inindex.html - Uninstalls
esbuildafter bundling to keep the image lean
docker build -t openclaw-nvidia sandboxes/openclaw-nvidia/
On Jetson Thor: The Blackwell GPU is automatically available to inference workloads via the NVIDIA Container Toolkit. No manual CUDA configuration needed.
Step 3: Create the Sandbox
Use openshell to create and start the sandbox, forwarding the UI port:
openshell sandbox create \
  --name openclaw-nvidia \
  --from sandboxes/openclaw-nvidia \
  --forward 18789 \
  -- env CHAT_UI_URL=http://127.0.0.1:18789 \
         NVIDIA_INTEGRATE_API_KEY=<your-api-key> \
         openclaw-nvidia-start
What openclaw-nvidia-start does at startup:
- Injects API keys — replaces
__NVIDIA_INTEGRATE_API_KEY__placeholders baked into the bundled JS with your real runtime values - Runs
openclaw onboard— configures the environment non-interactively in--mode localwith a stub base URL - Patches
openclaw.json— setsallowedOriginsfor yourCHAT_UI_URL, configures the default model (qwen/qwen3.5-397b-a17b, 200K context window, 8192 max tokens), and enables trusted proxy headers - Copies
policy.yamlfrom read-only/etc/openshell/to writable/sandbox/.openclaw/so the proxy can update it at runtime - Starts the OpenClaw gateway in the background on port 18788
- Starts the policy proxy on port 18789
- Prints the gateway URL with auth token
Access the UI at: http://127.0.0.1:18789/
Step 4: API Key Injection — How It Works Under Landlock
One of the subtle but important details in openclaw-nvidia-start.sh is how API key injection handles Landlock filesystem isolation:
# /usr is read-only under Landlock, so sed -i (which creates a temp
# file in the same directory) fails. Instead: sed to /tmp, write back
# via shell redirection to the existing inode.
tmp="/tmp/_nemoclaw_bundle_$$"
cp "$BUNDLE" "$tmp"
sed -i "s|__NVIDIA_INTEGRATE_API_KEY__|${NVIDIA_INTEGRATE_API_KEY}|g" "$tmp"
cp "$tmp" "$BUNDLE"
rm -f "$tmp"
If even the /tmp copy-back is blocked, the script skips injection gracefully and prints a note — users can still enter keys via the API Keys page in the sidebar.
Keys can be provided two ways (in order of precedence):
| Method | How |
|---|---|
Browser localStorage |
Enter via the API Keys page in the UI sidebar — persists across page reloads |
| Environment variable | NVIDIA_INTEGRATE_API_KEY — baked into the JS bundle at container startup |
Step 5: The Policy System
The policy.yaml is NemoClaw's enterprise security backbone. It defines filesystem and network access controls enforced at the kernel level via Landlock:
filesystem_policy:
  read_only:
    - /usr
    - /lib
    - /etc
  read_write:
    - /sandbox
    - /tmp
    - /dev/null

network_policies:
  nvidia:
    endpoints:
      - { host: integrate.api.nvidia.com, port: 443 }
    binaries:
      - { path: /usr/bin/python3 }
      - { path: /usr/local/bin/opencode }

  github_rest_api:
    endpoints:
      - host: api.github.com
        port: 443
        protocol: rest
        tls: terminate
        enforcement: enforce
        rules:
          - allow: { method: GET, path: "/**" }   # Read-only by default
          # Uncomment to allow writes to a specific repo:
          # - allow: { method: "*", path: "/repos/<owner>/<repo>/**" }
    binaries:
      - { path: /usr/local/bin/claude }
      - { path: /usr/bin/gh }
Key design decisions worth calling out:
- Binary-scoped network enforcement — each outbound connection is tied to a specific binary path (
/usr/bin/node,/usr/bin/python3), not just a process name - L7 REST enforcement — GitHub API access is whitelisted by HTTP method and URL path pattern, not just host/port
- TLS termination —
tls: terminatemeans the proxy inspects the request before forwarding, enabling real L7 policy enforcement - Read-only
/usrand/etc— agents cannot modify system binaries or config - Landlock
best_effort— gracefully degrades on kernels without Landlock support rather than failing hard
The policy-proxy.js exposes /api/policy so the UI can read and update this YAML at runtime — no container rebuild needed to adjust security rules.
Step 6: The NeMoClaw DevX UI Extension
The TypeScript extension in nemoclaw-ui-extension/extension/ is what turns the base OpenClaw UI into a full NemoClaw experience. It uses MutationObserver to detect OpenClaw DOM elements and injects enterprise UI components as overlays — without forking OpenClaw's source code.
| File | Purpose |
|---|---|
index.ts |
Entry point — bootstraps all components, wires data-nemoclaw-goto nav |
model-registry.ts |
Model definitions, API key getters/setters (localStorage + env fallback) |
model-selector.ts |
Dropdown to switch between NVIDIA models |
deploy-modal.ts |
Deploy-to-DGX modal with DGX Spark / DGX Station target selection |
api-keys-page.ts |
API Keys settings page with masked inputs and save/validation |
nav-group.ts |
Sidebar nav group with live status dot indicators |
gateway-bridge.ts |
Communication bridge to the OpenClaw gateway |
icons.ts |
SVG icon constants |
styles.css |
All extension styles |
The zero-fork approach means NVIDIA can ship enterprise UI features that track upstream OpenClaw releases without maintaining a divergent codebase.
Step 7: Running on Brev (Cloud Alternative)
If you're testing without a physical Jetson Thor, NVIDIA has integrated NemoClaw with Brev for cloud-based sandboxes. Just swap CHAT_UI_URL:
openshell sandbox create \
  --name openclaw-nvidia \
  --from sandboxes/openclaw-nvidia \
  --forward 18789 \
  -- env CHAT_UI_URL=https://187890-<your-brev-id>.brevlab.com \
         NVIDIA_INTEGRATE_API_KEY=<your-api-key> \
         openclaw-nvidia-start
The startup script parses the origin from CHAT_UI_URL and adds it to allowedOrigins in openclaw.json automatically — so browser auth works without the slow device-pairing fallback.
Step 8: MIG Isolation on Jetson Thor (Production Tip)
For production multi-agent workloads, use Jetson Thor's Multi-Instance GPU (MIG) to give each agent its own isolated compute slice:
# Enable MIG mode
sudo nvidia-smi -i 0 -mig 1

# Create two partitions
sudo nvidia-smi mig -cgi 4g.20gb,4g.20gb -C

# Verify
nvidia-smi mig -lgi
Pin agent workloads to specific MIG instances via container --gpus flags or by setting CUDA_VISIBLE_DEVICES per process — no agent starves another, and you get hardware-level isolation on top of NemoClaw's software-level policy enforcement.
Manual Startup (Without openshell)
If you prefer to run the container directly with Docker:
docker run -it --gpus all --runtime nvidia \
  -p 18789:18789 \
  -e CHAT_UI_URL=http://127.0.0.1:18789 \
  -e NVIDIA_INTEGRATE_API_KEY=<your-key> \
  openclaw-nvidia \
  openclaw-nvidia-start
Or step through it manually inside the container:
openclaw onboard
openclaw gateway run
Note: Without running openclaw-nvidia-start, API key placeholders stay as literals and NVIDIA model endpoints won't work unless keys are entered via the UI.Summary
The openclaw-nvidia sandbox gives you a production-ready, security-hardened NemoClaw deployment on Jetson AGX Thor. What makes it genuinely enterprise-grade:
- Binary-scoped network enforcement — not just IP allowlisting; each connection is tied to a specific executable
- L7 REST policy enforcement — GitHub and NVIDIA API access controlled at the method and path level
- Landlock filesystem isolation — read-only
/usrand/etc; agents can only write to/sandboxand/tmp - Landlock-safe API key injection — handles read-only filesystem constraints gracefully
- Zero-fork UI extension — enterprise features layered on top of OpenClaw via
MutationObserver - Runtime policy updates — change security rules without rebuilding the image via the policy proxy
- One-click Brev deploy — cloud-based testing when physical Jetson Thor isn't needed
The full source is on GitHub: NVIDIA/OpenShell-Community
Try it out and share your setups in the Collabnix community — would love to see what you build on Jetson Thor!