How I Turned My NVIDIA NemoClaw Exploration Into a Docker Labspace
NemoClaw is a show-don't-tell technology. Labspaces are show-don't-tell teaching. After running NVIDIA's new enterprise AI agent platform on Jetson AGX Thor and Apple Silicon, I turned the whole experience into a guided, browser-based lab — every command, every error, every policy hash.

NVIDIA dropped NemoClaw at GTC 2026 on March 16th, and within hours I was already deep in the source code on my Jetson AGX Thor and then my Apple M5 Max MacBook. After publishing two articles on my blog and watching the Collabnix community light up with questions, I realized the best way to help people learn NemoClaw wasn't another how-to post.
It was an interactive, self-contained lab environment where you could try every command yourself, hit every error I hit, and see exactly what the security model does in practice.
So I built the NemoClaw Labspace ~ a guided, browser-based hands-on lab powered by Docker's Labspace infrastructure: github.com/ajeetraina/labspace-nemoclaw.
Here's how I did it, and why the Labspace format is exactly right for teaching something like NemoClaw.
Why NemoClaw Needs a Labspace
NemoClaw is genuinely different from anything most developers have run before. It's not just "a model + a CLI." It's an entire agent execution stack:
- OpenShell as the sandboxing runtime (Landlock + seccomp + network namespaces)
- A policy engine that enforces access at the binary, host, method, and path level
- A versioned policy system with cryptographic hashes for every rule change
- A TUI (terminal UI) for watching live network decisions happen in real time
The moment someone reads "network namespace isolation" in a README, their eyes glaze over. But the moment they approve a blocked network request in the TUI and watch their agent succeed, something clicks.
That's the core insight: NemoClaw is a show-don't-tell technology. Labspaces are show-don't-tell teaching. They were made for each other.
What Is a Docker Labspace?
A Labspace is a self-contained, browser-accessible interactive tutorial environment built on Docker's labspace-starter template. It combines:
- A markdown-based curriculum authored in
labspace/with structured steps, code blocks, and exercises - A Docker Compose stack (
compose.yaml) that serves the interactive UI locally - A hot-reload dev workflow — edit markdown on your host, see changes instantly in the running lab
- A CI/CD publishing pipeline (GitHub Actions) that builds and pushes the lab image to Docker Hub
The student gets a guided web UI on one side and a terminal on the other. The lab walks them through every step while the real environment is running right beside them.
Setting Up the Repository
I started from the official Docker Labspace template:
# Create new repo from template on GitHub, then clone it
git clone https://github.com/ajeetraina/labspace-nemoclaw
cd labspace-nemoclaw
The template ships with everything wired up: a compose.yaml that starts the Labspace server, a compose.override.yaml for hot-reload dev mode, and a .github/workflows/ folder ready for the publish pipeline.
Starting the local dev environment takes one command:
# macOS / Linux
CONTENT_PATH=$PWD docker compose up --watch

# Windows (PowerShell)
$Env:CONTENT_PATH = (Get-Location).Path; docker compose up --watch
Open http://localhost:3030 and you have a live preview of the lab. Every markdown edit refreshes automatically.
Designing the Lab Curriculum
The hardest part wasn't technical — it was deciding what story the lab should tell.
NemoClaw has a lot of moving pieces. I could have written a comprehensive reference lab covering every CLI flag. Instead, I structured it around the journey I actually took:
- What is NemoClaw? — Framing the problem (AI agents you can actually trust) before touching a terminal
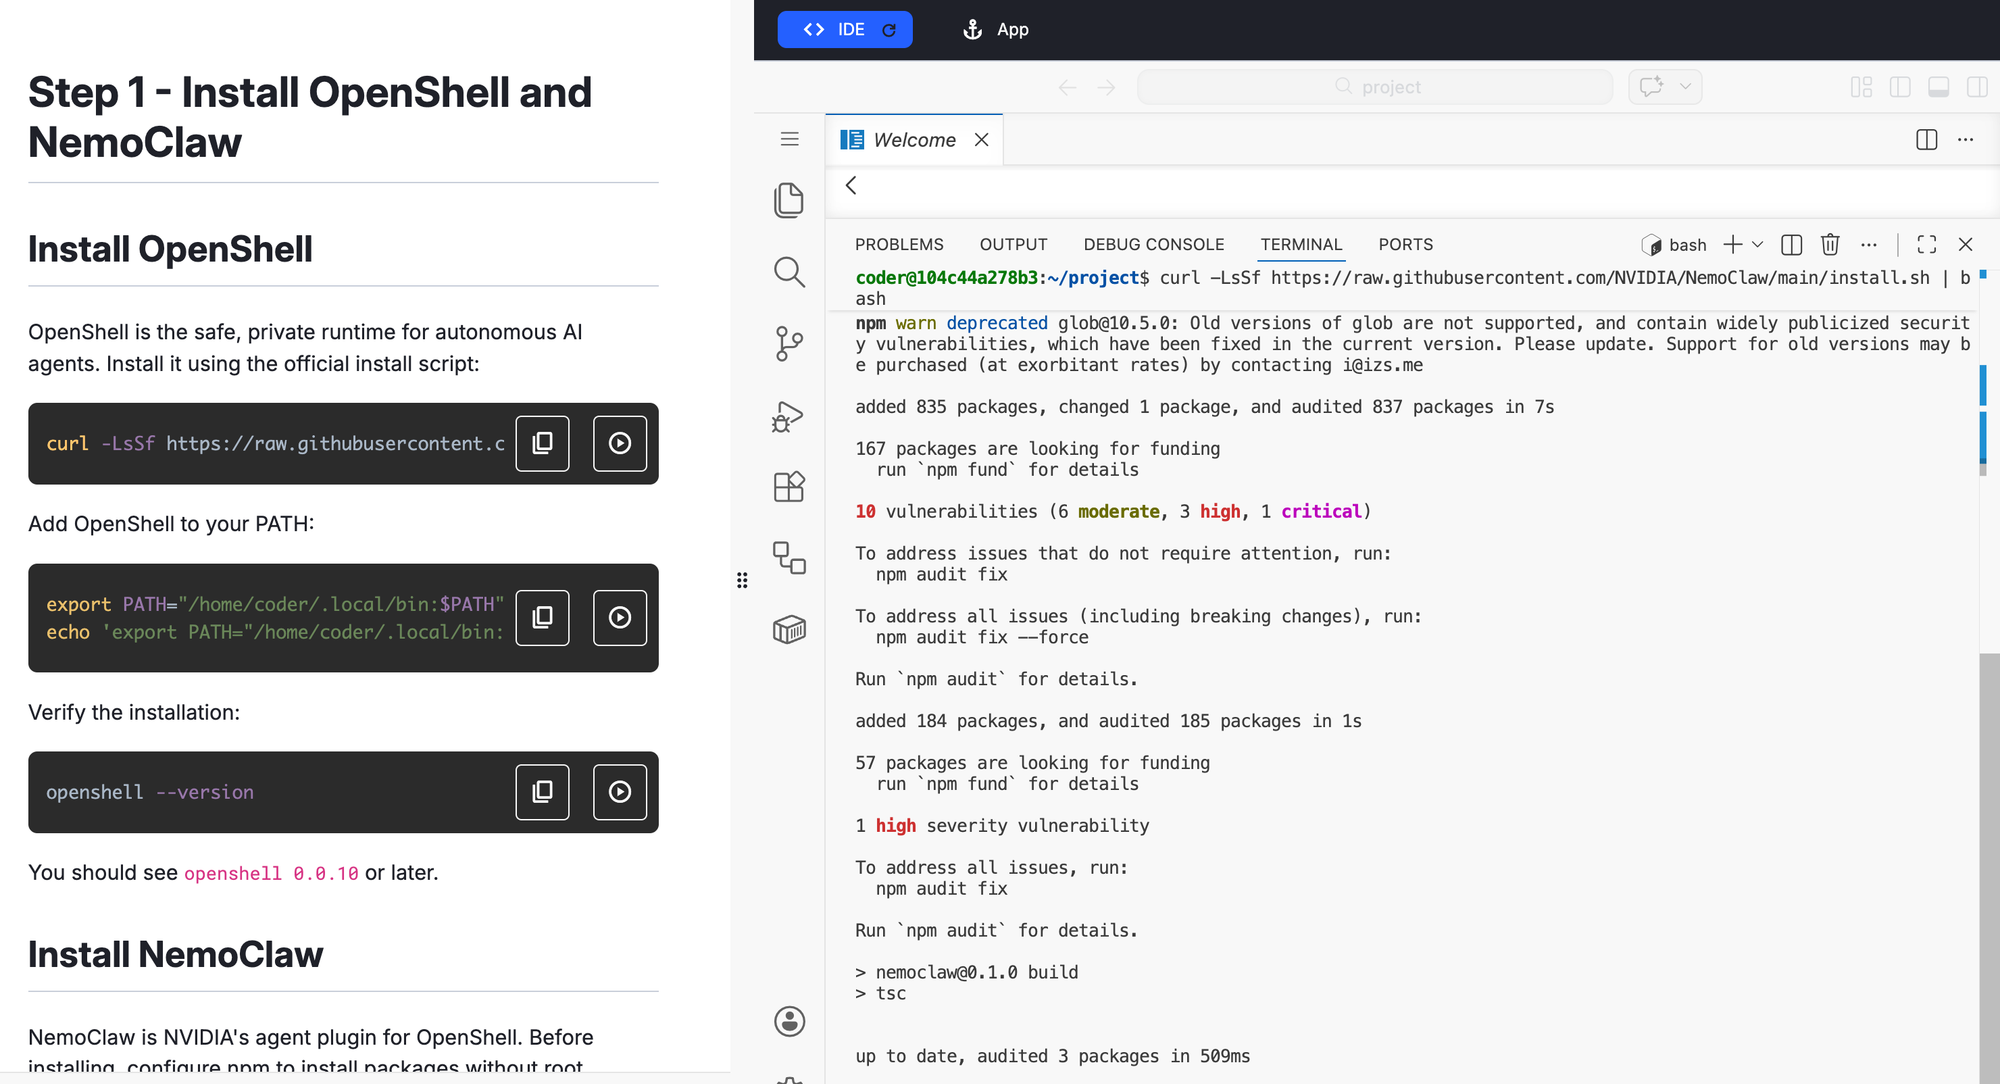
- Prerequisites and install — The one-liner installer, the Node.js version gotcha, the PATH fix
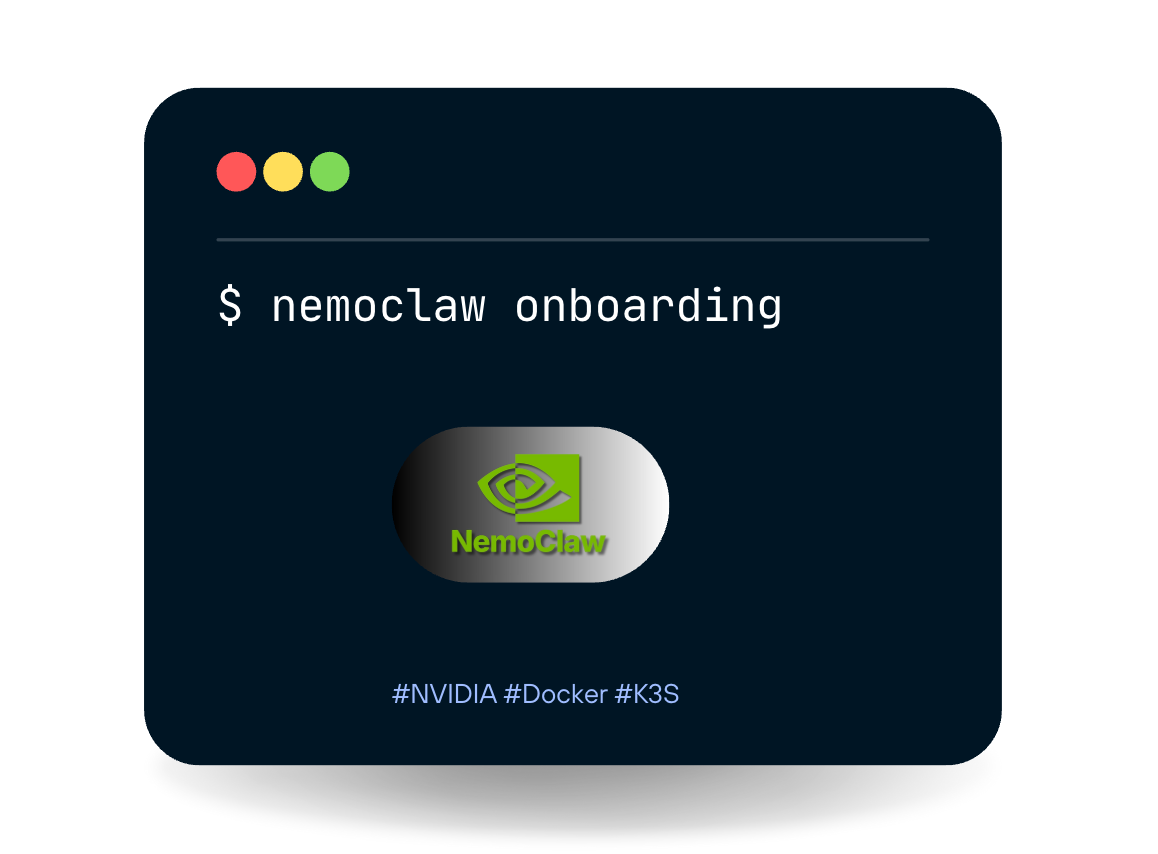
- Your first sandbox — Running
nemoclaw onboardand understanding the 7-step wizard - The Gateway — What OpenShell is doing under the hood and why it matters
- Policy presets — Adding
docker,npm,pypi, andhuggingfacepresets and watching the versioned hash trail - The TUI — Opening
openshell termin a second terminal and watching live network decisions - Your first agent task — Giving the agent a real job and approving/denying its network requests
- Apple Silicon specifics — What works, what's broken (Ollama DNS), and the Docker Model Runner gap
- Production patterns — MIG isolation on Jetson Thor, Brev cloud deployment
Each section has concrete commands, expected output, and at least one "what just happened and why" explanation because that's what was missing from the existing NemoClaw documentation when I first explored it.
The labspace.yaml - Giving the Lab an Identity
The labspace/labspace.yaml file is where you set the title, description, and metadata:
title: "Getting Started with NVIDIA NemoClaw"
description: >
  Explore NemoClaw — NVIDIA's open-source enterprise AI agent platform
  built on OpenShell. Learn to create sandboxed agents, manage
  policy-based security, and run always-on AI agents with full
  privacy and network control.
This is what appears in the Labspace catalog and in the browser tab. Short, honest, outcome-focused.
The Publishing Pipeline
The template ships with a publish-labspace.yaml.temp GitHub Actions workflow. Activating it takes two steps:
Step 1: Add your Docker Hub credentials as repository secrets:
DOCKERHUB_USERNAMEDOCKERHUB_TOKEN
Step 2: Update the DOCKERHUB_REPO variable in the workflow file and rename it to activate it:
# In .github/workflows/publish-labspace.yaml.temp
# Update: DOCKERHUB_REPO: ajeetraina/labspace-nemoclaw
# Then:
mv .github/workflows/publish-labspace.yaml.temp \
   .github/workflows/publish-labspace.yaml
git add . && git commit -m "activate publish pipeline" && git push
From this point, every push to main triggers a build and publishes the updated Labspace image to Docker Hub automatically.
What I Learned Building This
Teaching NemoClaw's security model is the whole lab. Most of NemoClaw's value is invisible until it blocks something. I built the curriculum to make the security model visible at every step — showing the policy hash after each policy-add, walking through what Landlock actually enforces at the kernel level, and making the TUI a required step rather than an optional extra.
The Apple Silicon section earned its place. My Apple Silicon walkthrough became one of the most referenced NemoClaw resources within days of publication — and ended up cited in the official NemoClaw GitHub issue tracker for macOS support. A lot of developers are running Macs. The lab doesn't pretend they don't exist.
Hands-on beats documentation every time. NemoClaw's official docs are good. But there's a gap between "here are the commands" and "here is what it feels like to use this in practice." The Labspace lives in that gap. You run the commands, you see the real output, you hit the real errors (like the Node.js PATH issue after install), and you fix them.
Try It
The Labspace repository is live at:
👉 github.com/ajeetraina/labspace-nemoclaw
If you're new to NemoClaw, start there. If you run into anything the lab doesn't cover — questions, edge cases, hardware quirks — drop into the Collabnix community on Slack or Discord. We have 17,000+ members who are actively experimenting with exactly this kind of agentic AI infrastructure.
And if you build something interesting with NemoClaw, I'd love to feature it. The Collabnix ecosystem has always been at its best when it's a community of practitioners sharing real findings — not polished marketing. This lab is my contribution to that tradition.