I Tried the RIITEK S11 Tri-Screen Monitor with My MacBook Pro - Here's My Experience
Triple your screen real estate in under 5 minutes

You know that feeling when you're running a Docker workshop, and you've got your terminal on one side, Docker Desktop on the other, and you're constantly switching tabs because there's just not enough screen space? Yeah, I've been there way too many times.
So when I heard about portable tri-screen monitors that attach directly to your laptop, I knew I had to try one. I picked up the RIITEK S11 and set it up with my 14-inch MacBook Pro M1 Pro.
Spoiler: It was surprisingly easy. Let me walk you through the unboxing and setup.
The Unboxing Experience
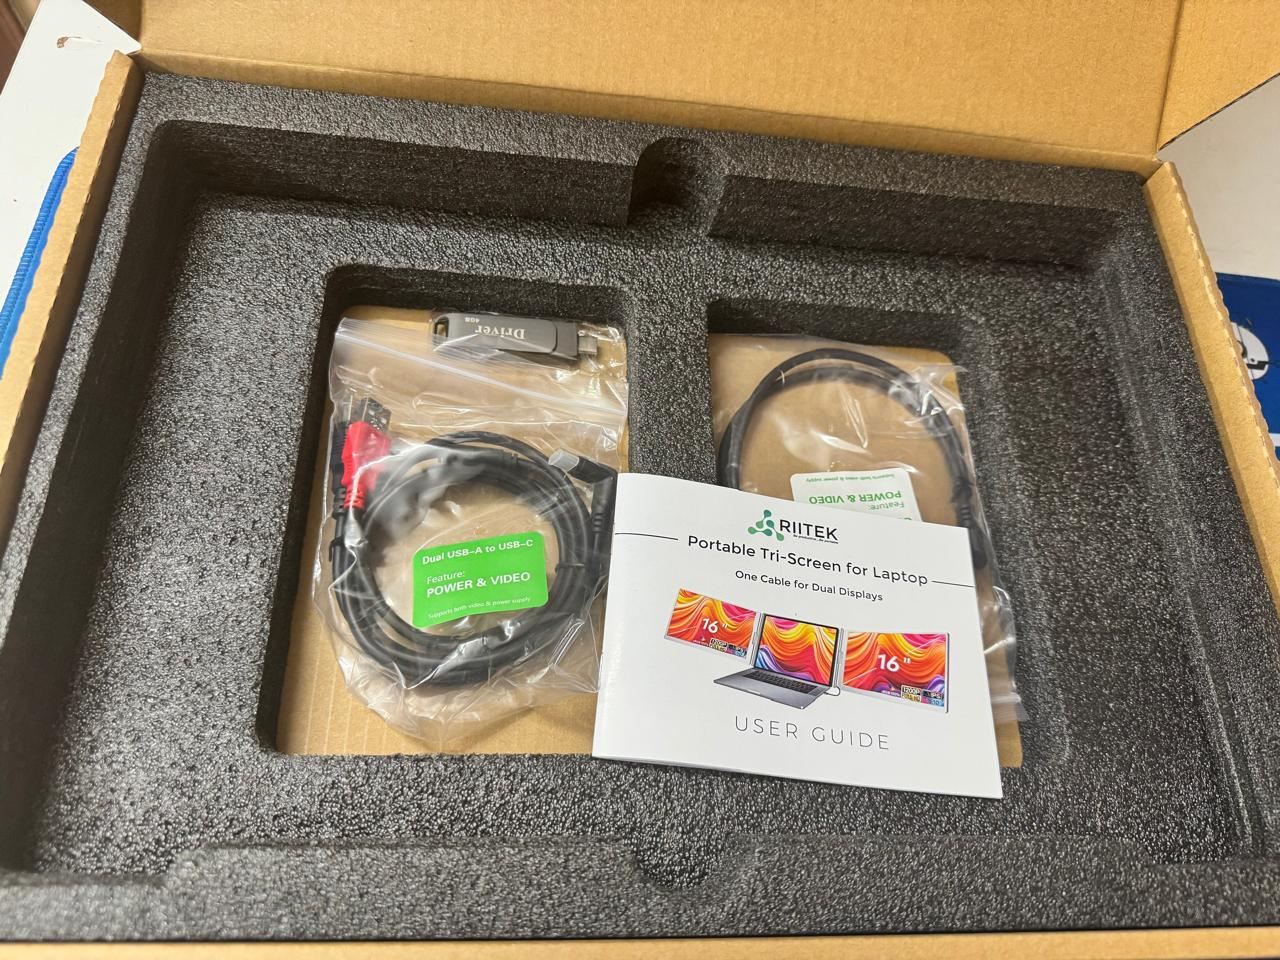
The package arrived in a sturdy box - which is reassuring when you're dealing with two additional screens. Here's what I found inside:
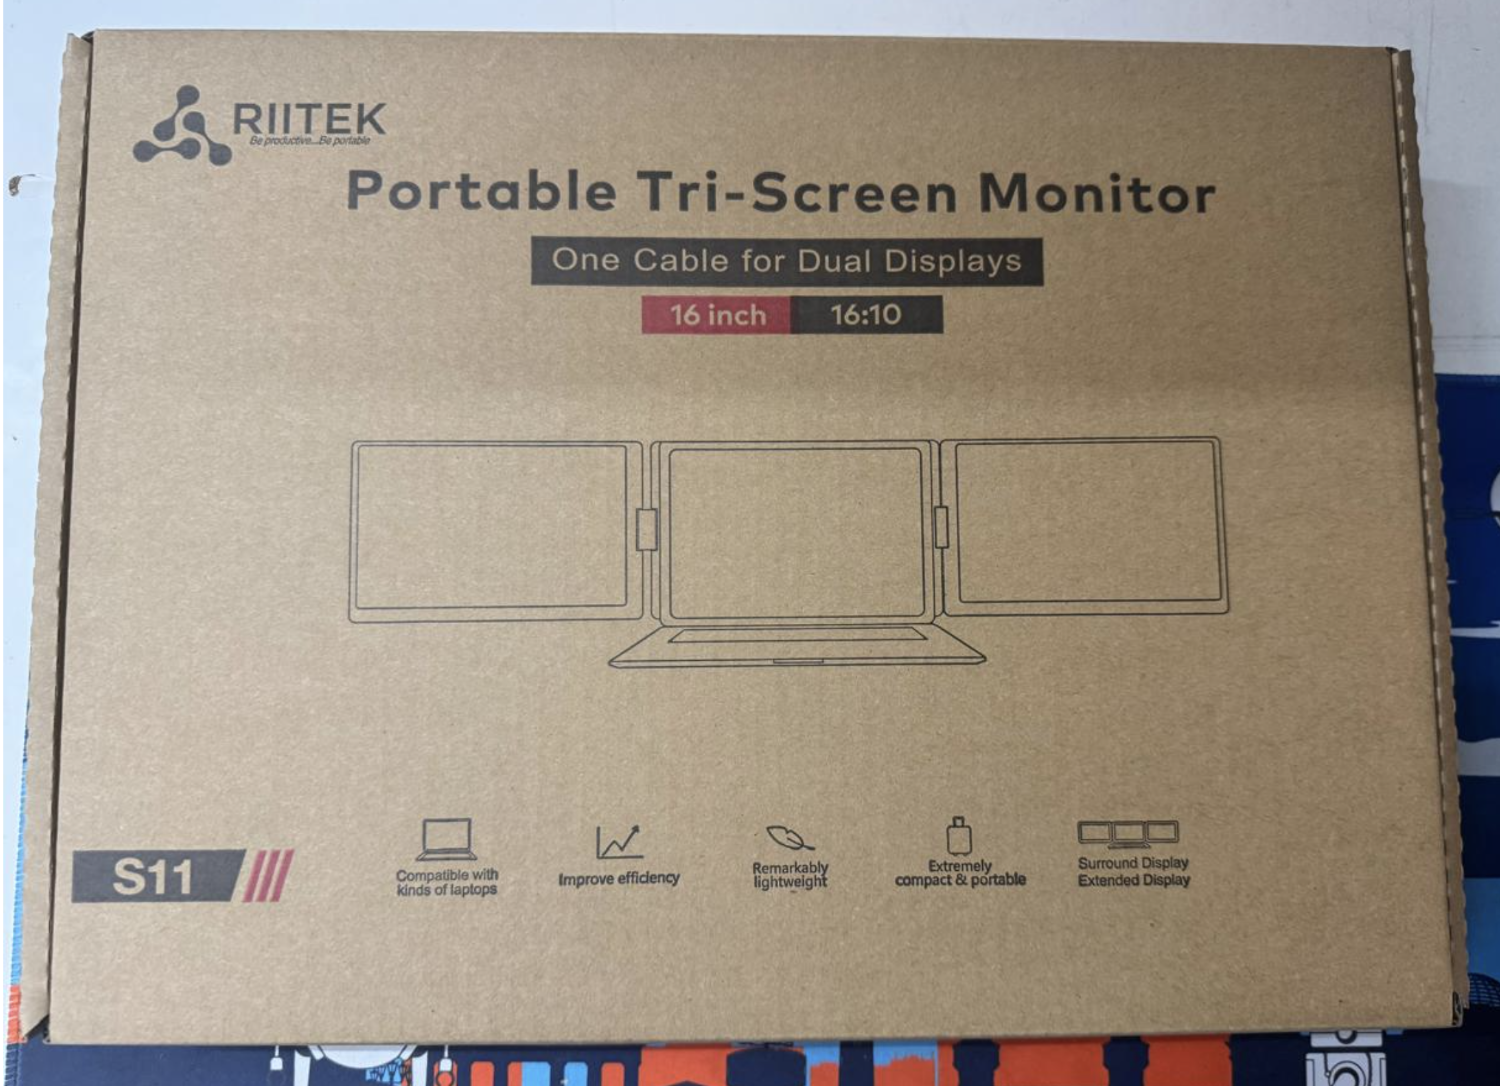
What's in the box:
- The RIITEK S11 tri-screen unit (two 14-inch monitors connected by a mounting bracket)
- USB-C to USB-C cable for data/video
- USB-C power adapter (5V 3A)
- Power cable with red connector
- Quick start guide
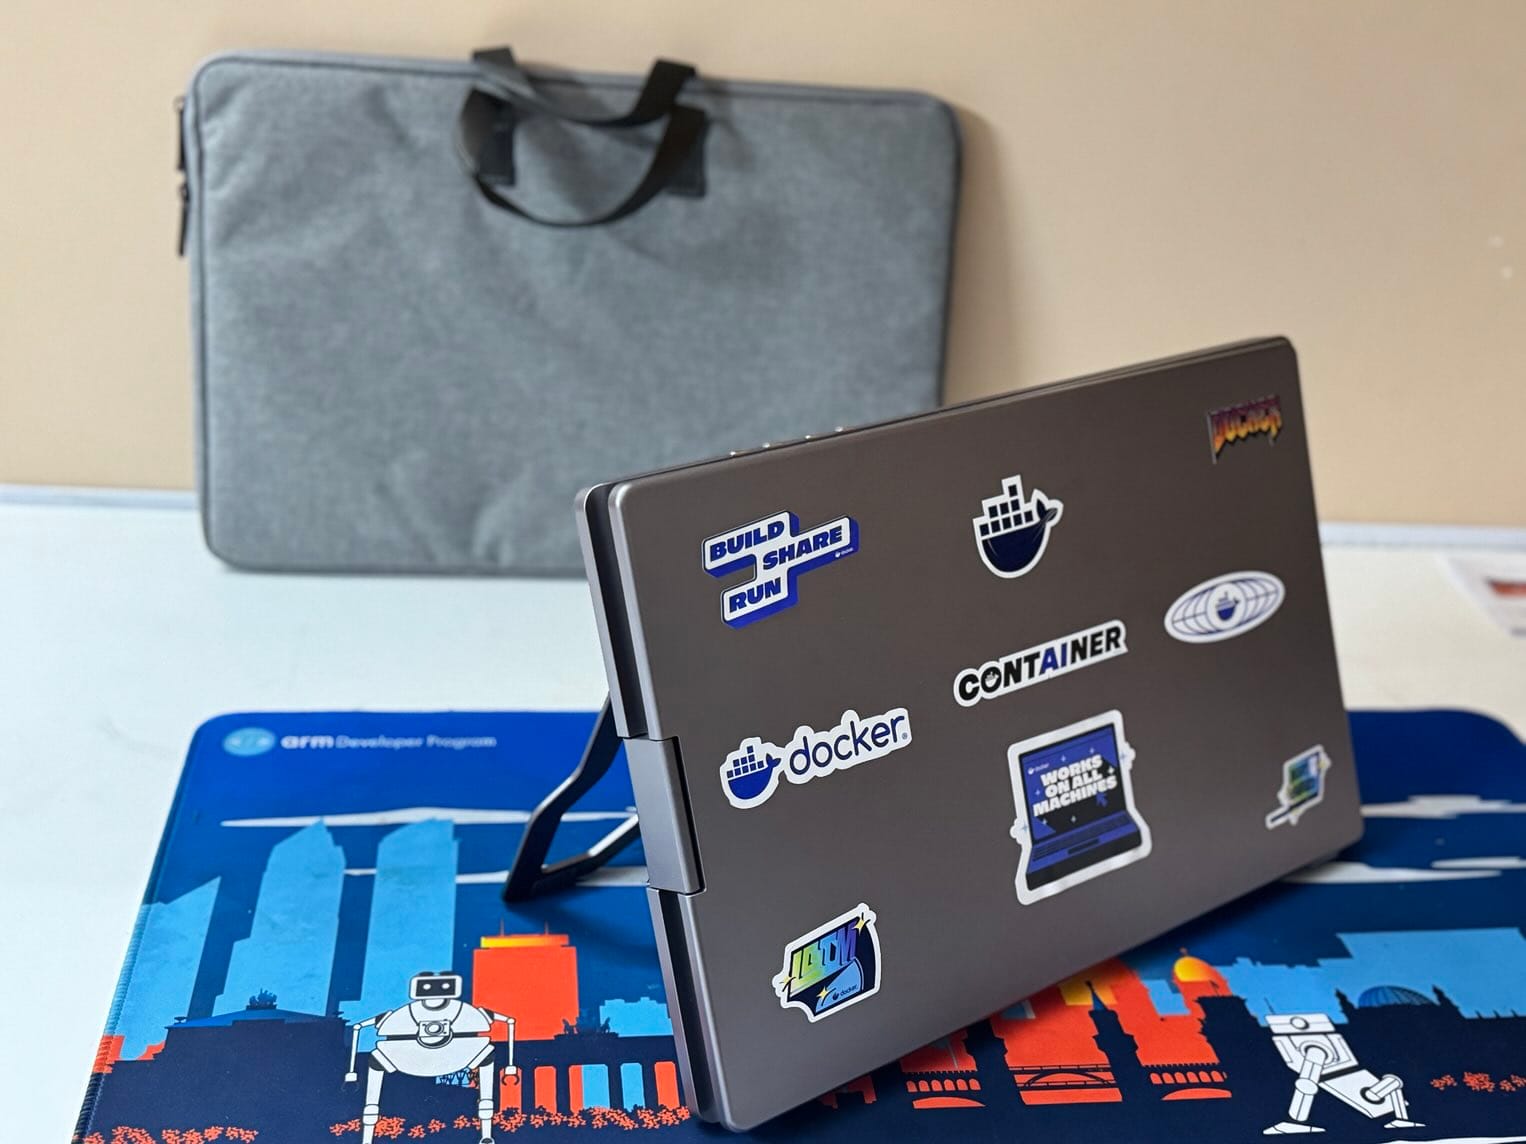
- Protective sleeve
The build quality feels solid. The monitors fold flat against each other for transport, and the mounting mechanism uses adjustable clips that grip onto your laptop lid. No tools required.
First impression? It's lighter than I expected. The whole unit weighs around 1.4 kg, which is reasonable considering you're getting two full displays.
Physical Setup
Attaching the RIITEK to my MacBook took about a minute:
- Opened my MacBook lid fully
- Slid the mounting bracket onto the back of the lid
- Tightened the adjustable clips until it felt secure
- Unfolded both side monitors
The monitors can angle outward, which is nice for reducing glare and finding your optimal viewing position.
Driver Installation & Connection
Here's where I was expecting some headaches, but it turned out to be completely straightforward.
Step 1: Install the Driver
RIITEK provides a driver for macOS. I downloaded it from their website, ran the installer, and restarted my MacBook. That's it.
Step 2: Connect the Cables
- Connected the power adapter to the RIITEK (look for the blue LED to confirm power)
- Plugged the USB-C cable from RIITEK to my MacBook's Thunderbolt port
Step 3: Done!
Both screens lit up immediately. macOS detected them as "USB DISP (1)" and "USB DISP (2)" in System Settings → Displays.
I selected "Use as Extended Display" for each monitor, arranged them to match my physical layout (left - center - right), and I was ready to go.
Total setup time from unboxing to working triple-screen setup: under 5 minutes.
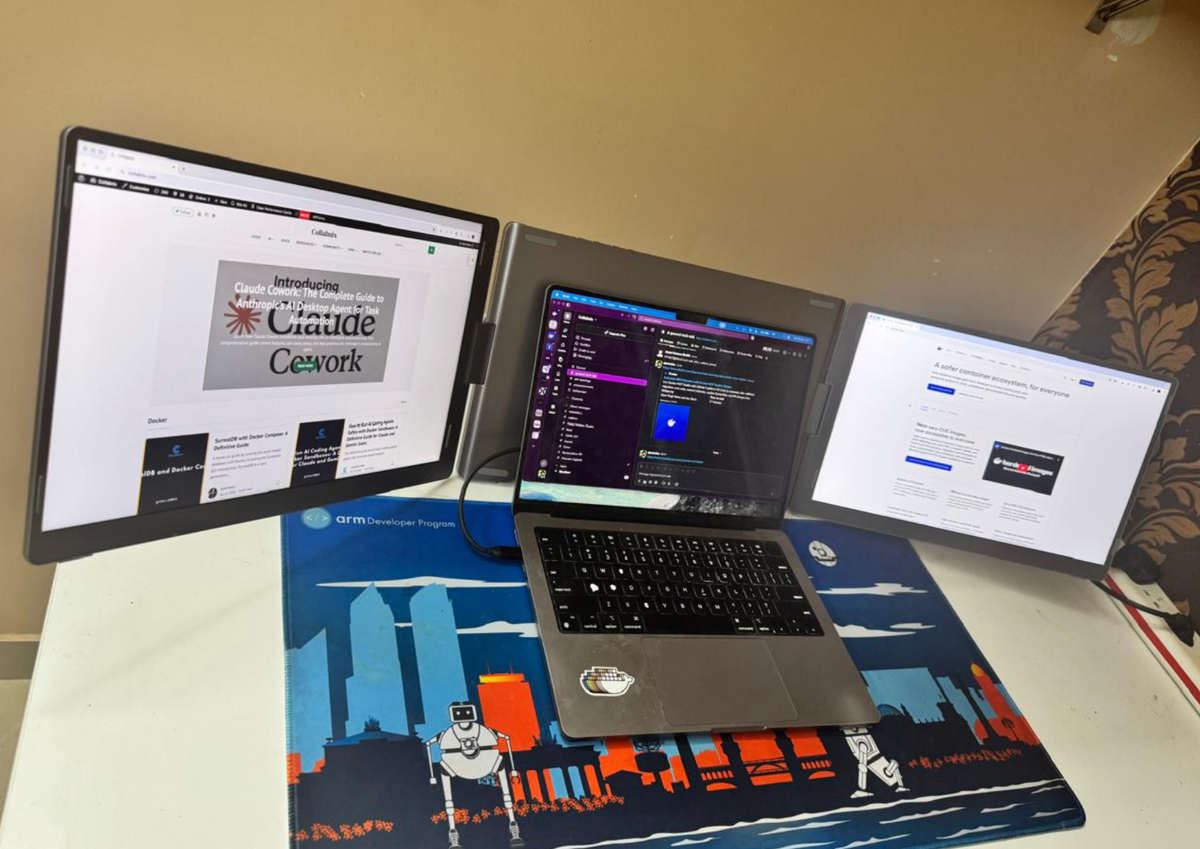
My Developer Workflow Now
This setup has genuinely changed how I work. Here's how I typically arrange things:
Left Screen: Documentation, Collabnix blog drafts, reference materials
Center (MacBook): VS Code, terminal, main coding work
Right Screen: Docker Desktop, container logs, application preview
For my multi-agent AI demos, it's even better:
- Orchestrator output on one screen
- Individual agent logs on another
- The actual application running on the third
No more constant tab switching. No more "wait, where did that terminal go?" moments.
Perfect for Docker Workshops
If you're running workshops or presenting at conferences, this setup is a game-changer. I can now show:
- Live coding on one screen
- Terminal output on another
- The running application or Docker Desktop on the third
Your audience sees everything at once instead of watching you frantically switch tabs.
What You Need to Know Before Buying
Check Your Mac's Display Support
Not all Macs support multiple external displays:
| Chip | External Display Support |
|---|---|
| M1 (base) | 1 display only |
| M1 Pro | 2 displays ✓ |
| M1 Max | 3-4 displays ✓ |
| M2 (base) | 1 display only |
| M2 Pro | 2 displays ✓ |
| M2 Max | 3-4 displays ✓ |
| M3 (base) | 1 display only |
| M3 Pro | 2 displays ✓ |
| M3 Max | 3-4 displays ✓ |
I'm using an M1 Pro which supports 2 external displays natively - perfect for the RIITEK's dual side-monitors.
Don't Forget the Driver
The key to a smooth setup is installing the RIITEK driver before connecting the monitors. It takes 2 minutes and makes everything plug-and-play.
Power Requirements
The RIITEK S11 needs 5V 3A (15W) of power. Use the included power adapter - a standard phone charger won't provide enough juice.
Quick Setup Checklist
- ✅ Download and install the RIITEK driver
- ✅ Restart your MacBook
- ✅ Attach RIITEK to your laptop lid
- ✅ Connect power adapter (blue LED should light up)
- ✅ Connect USB-C cable to MacBook
- ✅ Configure displays in System Settings → Displays
- ✅ Enjoy your triple-screen setup!
The Verdict
I'm genuinely impressed by how smooth this was. Install driver, plug in, and it just works.
The RIITEK S11 has become part of my essential kit for:
- Conference presentations and workshops
- Working from cafes (yes, I'm that person now with three screens at a coffee shop)
- Home office productivity
- Docker and Kubernetes demos
If you're a developer who values screen real estate but also needs portability, this is absolutely worth considering. The setup couldn't be easier.
Ready to Get One?
If you're planning to order a RIITEK tri-screen monitor, you can use my referral link: https://riitek.in/?ref=higaprjd
Trust me, once you experience triple-screen productivity, there's no going back!
Quick Specs: RIITEK S11
- Screen Size: 14 inches × 2
- Resolution: 1920 × 1200 (Full HD+)
- Power: DC 5V 3A
- Connectivity: USB-C
- Weight: ~1.4 kg
- Compatibility: macOS (with driver), Windows, Linux
Have you tried a portable multi-monitor setup? I'd love to hear about your experience. Drop a comment below or find me on Twitter @ajeetsraina.
Happy coding! 🚀