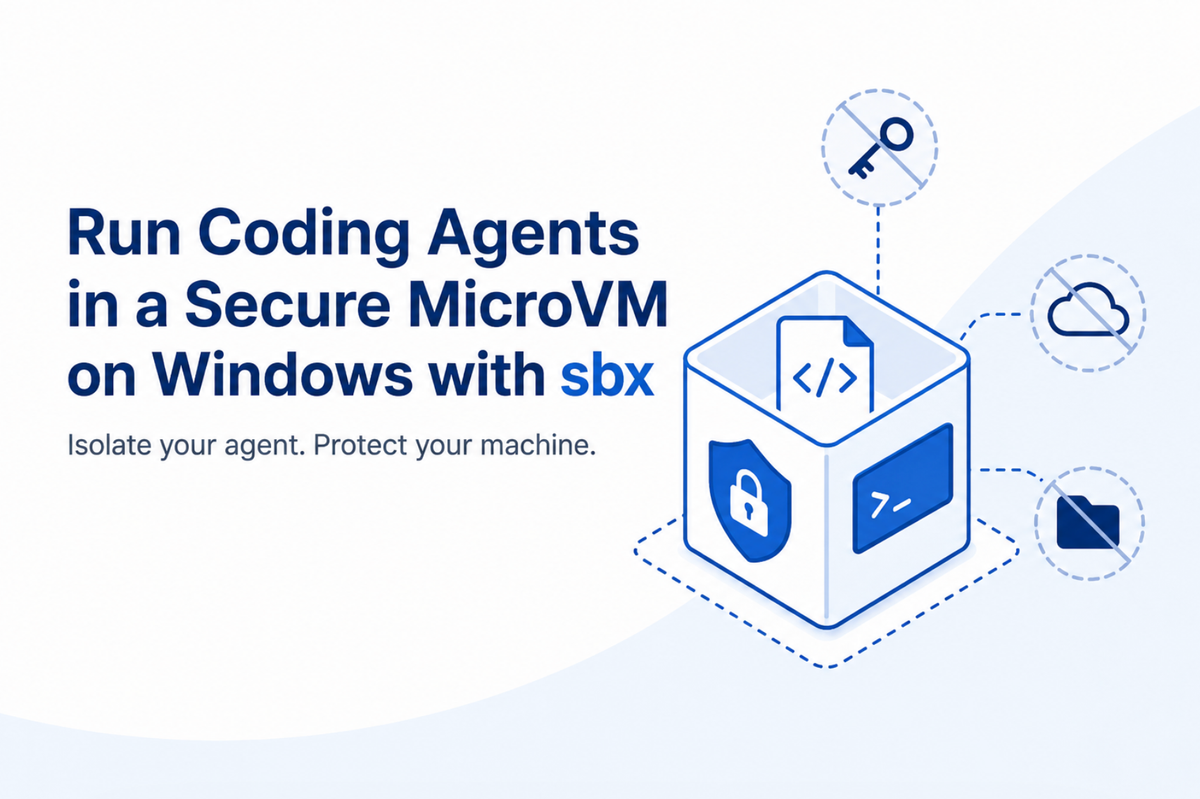
Running Coding Agents in a Secure MicroVM on Windows with sbx
Docker Sandboxes (sbx) runs your coding agent inside a microVM instead scoped to a single project directory, behind a network policy you control. Here's how to set it up on Windows, step by step.

When you hand a coding agent your repository, you're also handing it your shell. On the host, that means your SSH keys, your cloud credentials, and your entire home directory are one bad command or one prompt injection away from trouble. A container narrows that down, but a container shares the host kernel, so it was never really designed to be a security boundary against code you don't trust.
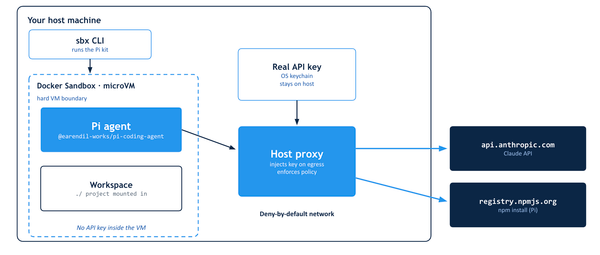
Docker Sandboxes (sbx) draws a harder line. The agent runs inside a microVM that can only see the project directory you explicitly mount. Everything else on your machine sits behind a real virtualization boundary. If the agent goes off the rails, the blast radius stops at the edge of the VM.
This guide walks through getting sbx running on Windows end to end: enabling the hypervisor, installing the CLI, wiring up your coding agent of choice (Claude Code, Codex, or Gemini CLI), and launching your first sandbox. By the end you'll have a coding agent working inside an isolated microVM on a real project and you'll see, first-hand, exactly where the boundary sits.
Prerequisites
sbx on Windows needs hardware virtualization exposed to the OS. You can get there through WSL2 or Hyper-V for this guide, I tested with Hyper-V.
Open an elevated PowerShell (Run as Administrator) and enable the required Windows features:
Enable-WindowsOptionalFeature -Online -FeatureName HypervisorPlatform -All
Enable-WindowsOptionalFeature -Online -FeatureName Microsoft-Windows-Subsystem-Linux -All
Enable-WindowsOptionalFeature -Online -FeatureName VirtualMachinePlatform -All
Why you must reboot before going further. ThesbxmicroVM backend rests on the Windows hypervisor plusVirtualMachinePlatform, regardless of whether you took the WSL2 or Hyper-V route. All three of the features above modify boot-time kernel components. TheEnable-WindowsOptionalFeaturecalls return success immediately, but the capability isn't actually live in the running kernel yet it only takes effect after a restart. Skip the reboot and you'll hit confusing failures later that look likesbxbugs but are really just the hypervisor not being loaded.
So: reboot once before moving on.
Step 1 Install the latest version of sbx
The simplest path is winget:
winget install -h Docker.sbxPrefer the bleeding edge? Grab a nightly build directly from the releases page:
👉 https://github.com/docker/sbx-releases/releases/tag/nightly
Download the .msi and either double-click it, or install silently from the command line:
msiexec /i DockerSandboxes.msi /quietStep 2 Verify your installation
Confirm the CLI is on your PATH and check the version:
PS C:\Users\ajeet> sbx version
sbx version: v0.34.0-rc1-216-g0be67a90 0be67a900e2a642c494353de466135d18d53f338
If sbx version returns a build string like the one above, you're good to go.
Step 3 Log in
sbx loginThe CLI prints a one-time device confirmation code and a URL. Open the URL, enter the code, and authorize the device. This is also where you choose your default network policy (more on that below).
Step 4 Choose your agent and provider
This lab works with any mainstream coding agent pick the provider whose API key you already have, and the rest of the steps adapt to it:
- OpenAI + Codex
- Anthropic + Claude Code
- Google + Gemini CLI
The pattern is the same for all three: export your key into your shell, then store it as a global sbx secret. The key is read from your environment it never gets pasted into a file, a repo, or this page, and it isn't echoed back anywhere.
OpenAI (Codex)
Export your key in your host PowerShell terminal:
$env:OPENAI_API_KEY = "sk-proj-..."Anthropic (Claude Code)
$env:ANTHROPIC_API_KEY = "sk-ant-..."Google (Gemini CLI)
$env:GEMINI_API_KEY = "AIza..."Store the key as a global secret
Once the key is in your environment, hand it to sbx as a global secret. The command reads the value from your shell variable and stores it under a name the sandbox can reference your key stays out of any visible output:
echo "$GOOGLE_API_KEY"    | sbx secret set -g google
echo "$ANTHROPIC_API_KEY" | sbx secret set -g claude
echo "$OPENAI_API_KEY"    | sbx secret set -g openai
Run only the line for the provider you're using.
Step 5 Clone the lab repository
The exercises use DevBoard, a full-stack FastAPI + Next.js issue tracker that ships with intentional bugs. It's already wired up for this lab:
git clone https://github.com/dockersamples/sbx-quickstart ~/sbx-lab
cd ~/sbx-lab
Step 6 Create your sandbox
From inside the project directory, create a sandbox and attach your chosen agent. Replace <agent> with codex, claude, or gemini:
cd ~/sbx-lab
sbx create --name=sbxlab <agent> .
First run: the agent image pulls (1–2 minutes), and the sandbox is created using the network policy you selected at login.
List your sandboxes:
sbx lsYou'll see the sandbox listed with status stopped:
PS C:\Users\ajeet> sbx ls
SANDBOX                  AGENT  STATUS   PORTS  WORKSPACE
shell-sbx-kits-box-main  shell  stopped         C:\Users\ajeet\Downloads\sbx-kits-box-main\sbx-kits-box-main
PS C:\Users\ajeet>
The status flips to running once you start it in the next step.
Step 7 Run your sandbox
Start the sandbox by name:
sbx run shell-sbx-kits-box-mainWhen prompted, select 1. Yes, continue to launch the agent.
Why this prompt exists: sbx mounts only your project directory into the microVM. The trust check makes sure you're aware of exactly what the agent can see and act on before it starts. Nothing outside that mount is visible to the agent.Confirm it's now running:
PS C:\Users\ajeet> sbx ls
SANDBOX                  AGENT  STATUS   PORTS  WORKSPACE
shell-sbx-kits-box-main  shell  running         C:\Users\ajeet\Downloads\sbx-kits-box-main\sbx-kits-box-main
PS C:\Users\ajeet>
Set the network policy
Network policy controls what the sandbox can reach. To clear any existing policies and start from a clean slate, run sbx policy reset from the host:
PS C:\Users\ajeet> sbx policy reset
Found 1 running sandbox(es):

shell-sbx-kits-box-main
The daemon will be stopped to apply the policy reset.
Running sandboxes will be terminated.

Are you sure you want to continue? (y/N): y
Stopping daemon at \.\pipe\docker_kaname_sandboxd...
✓ Daemon stopped successfully
✓ Policies reset.

Daemon started (PID: 28492, socket: \.\pipe\docker_kaname_sandboxd)
Logs: C:\Users\ajeet\AppData\Local\DockerSandboxes\sandboxes\state\sandboxd\daemon.log
Note that resetting policy stops the daemon and terminates running sandboxes that's expected. The daemon restarts automatically once the reset completes.
Confirm you're actually inside the microVM
Drop into the sandbox shell and check the OS. You're not on Windows anymore you're inside an Ubuntu microVM:
agent@shell-sbx-kits-box-main:sbx-kits-box-main$ cat /etc/os-release
PRETTY_NAME="Ubuntu 26.04 LTS"
NAME="Ubuntu"
VERSION_ID="26.04"
VERSION="26.04 (Resolute Raccoon)"
VERSION_CODENAME=resolute
ID=ubuntu
ID_LIKE=debian
...
Now here's the part worth pausing on. Try running an sbx command from inside the sandbox:
agent@shell-sbx-kits-box-main:sbx-kits-box-main$ sbx policy reset
bash: sbx: command not found
That command not found isn't a broken install it's the boundary working as designed. sbx is a host-side tool. It controls the daemon over a Windows named pipe (\.\pipe\docker_kaname_sandboxd), which lives on the host and is deliberately not reachable from inside the microVM. The agent running in the sandbox cannot turn around and reconfigure its own jailer, lift its own network policy, or reach back out to control the host. The control plane stays on your side of the wall, where it belongs.
That's the whole point. The agent gets a real, functional Linux environment and full freedom inside the box and zero ability to act on anything outside it.
Where to go next
You now have a coding agent running inside an isolated microVM on Windows, scoped to a single project directory, behind a network policy you control. From here you can:
- Point the agent at DevBoard's intentional bugs and watch it work safely.
- Tighten or loosen the network policy and observe what the agent can and can't reach.
- Mount different project directories and see how the trust prompt changes with each one.
The mental shift sbx asks for is simple: stop trusting the agent, and start trusting the boundary. The container era taught us to ship code in isolation; the agent era asks us to run it in isolation too. On Windows, a few Windows-feature toggles and a reboot are all it takes to get there.